Adding Time to Timesheet for Support Ticket
Solution No. 57
Before you leave the activity that you have entered in for the Support Ticket, you are able to enter in your time.
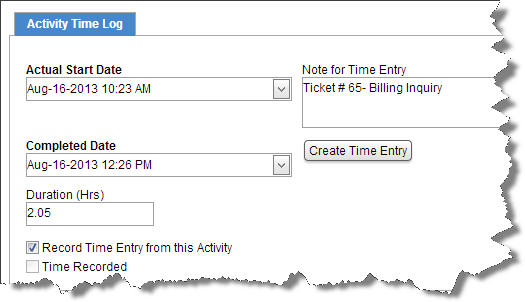
On the right-hand side of the screen, there is an “Activity Time Log.” The start time will automatically fill in based up on the time that you opened the activity. You can change this time if you are doing the actions after the fact.
When you are finished with the activity, click the dropdown arrow on the Completed Date and NEXT will automatically enter the ending date and time. Again, you are able to adjust this date/time as needed. Make sure to check the box “Record Time Entry from this Activity.”
Once you click Save or Save & Close, you get this message.
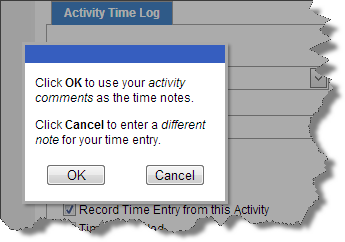
Click OK if you want the activity notes to be used for the timesheet.
Click Cancel if you want to enter separate notes for the timesheet.
Click Create Time Entry
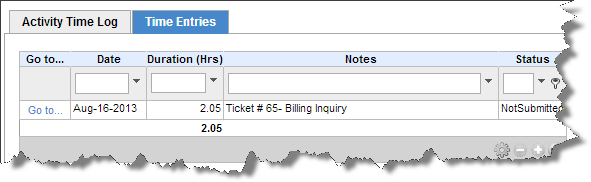
The Time entry tab will appear next to the Activity Time Log. You are able to see the time entry and change the billing status, or anything else if needed. The system will pick up the default in the NEXT preferences on the Billing Status.
| Created by | Robin H. on | Sep-02-2013 |
| Last modified by | Robin H. on | Sep-05-2013 |