Dashboard
Solution No. 64
Before you dive into the many nuts & bolts and bits & bytes that make up the SaaSphalt program, it will be helpful to understand the terminology that you might not recognize, some of which is unique to SaaSphalt. So, let’s familiarize you with those terms, so you’ll know what we’re talking about when we get to the full Help Center experience. We’ll also go into greater detail about the functionality of what you’re seeing on your computer screen, so you’ll know where to click and how to input the data when the time finally arrives!
What we won’t be discussing, at least right now anyway, is Customization. That will be a full separate guide later on, for when you are comfortable with using the base experience and choose to customize your SaaSphalt to better suit your company’s personality.
To get you better acquainted with the look and terminology of SaaSphalt we’ll walk you through the very first screen that you’ll see after logging in: the SaaSphalt homepage, also known as the Dashboard. From the Dashboard you can access all of the functions of the program that you’ll need. This page can also be called a Screen. Now, most people use the term “screen” when describing their computer’s monitor, but in programming a screen is used to describe the information you are seeing often after clicking on an object. Each Screen in SaaSphalt has its own look, feel, and function, and with the incredible amount of customization that's available, it would be nearly impossible to do an all-encompassing tutorial of how to use the site. Because of this, we'll simply be using the default of each of the screens.

App Tiles:
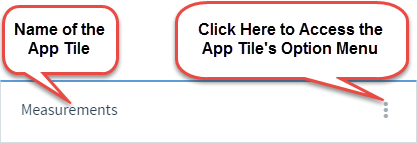
In the center of the Dashboard screen you’ll notice boxes called App Tiles. These tiles are direct links to each of the programs that make up SaaSphalt. Each of these consists of the name of the tile, a picture representing it (otherwise known as an icon), and a brief description of what its program does. Left-clicking on an app tile will take you to the corresponding screen that is associated with it.
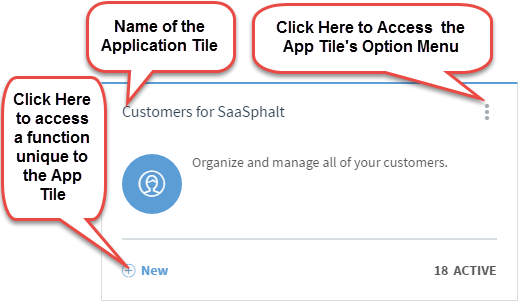
At the bottom of every app tile is a function unique to it. For example: The Customers for SaaSphalt tile shown above has a +New function below it, which allows the user to create a new customer profile. These functions are typically the most used ones of the tile and will also be accessible from the tile’s corresponding screen
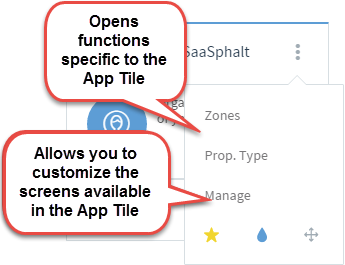
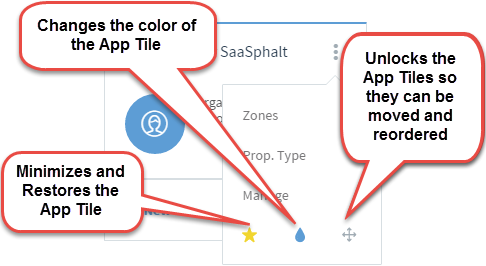
In the upper-right hand corner you’ll notice three vertical dots. These dots allow you to manage the tiles by bringing up the menu seen below
The Left Menu:
Along the left hand side of the screen you’ll notice a dark-blue bar which contains icons which correspond with those on the app tiles. As you hover your mouse pointer over the bar, you’ll notice that it expands and next to each icon is the name of the tile that corresponds with it. Like with the tiles, left-clicking on any of these icons, or their names, will take you to the screen associated with it. You’ll also notice the Dashboard icon, left-clicking this will bring you back to the Dashboard screen. Returning to the Dashboard does not delete anything you've been working on. That work is available in the Unsaved Work (see below)

Unsaved Work and the Right Menu:
Two images appear in the upper-right hand corner of the screen:

- The icon on the left is a picture of a clock which corresponds with the Unsaved Work screen. Left-clicking on the clock icon will show you any unsaved work you might have. This is useful for when you change screens and need to return. Whenever you fill out any of the fields or make any changes to one of the Screens in SaaSphalt, you have changed the Screen State of that screen. So, when you change screens, the clock icon allows you to go back without having to input all that information all over again, which is convenient.
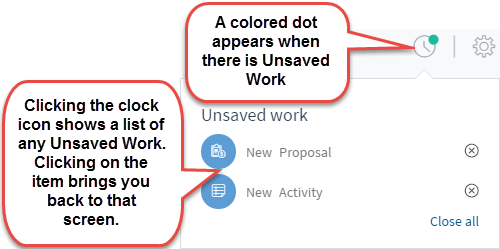
- The icon on the right is a picture of a gear which corresponds with another menu.
-
Preferences: Opens your user profile where you can access options for managing your personal profile. Those with Administrator privileges also have access to other options for managing the account.
-
Subscription: Opens the subscription screen where you can edit your packs as well as cancel your subscription.
-
Switch Account: If you have more than one Method account, this allows you to switch back and forth between the accounts without having to log in and out of the system.
-
Help: Opens the Method help center.
-
Sign Out: Allows you to sign out of your Method/SaaSphalt account.
Getting More Apps and Packs:
You might have noticed next to the minimized tiles is a dash-outlined box titled Get More Apps.
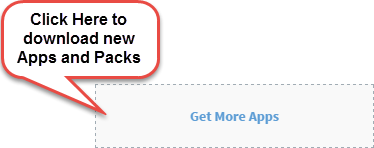
Clicking the Get More Apps tile will bring you to the App/Packs Marketplace where you can install new Packs. While some of these are available at no additional costs, most of the packs will incur additional charges to your account.
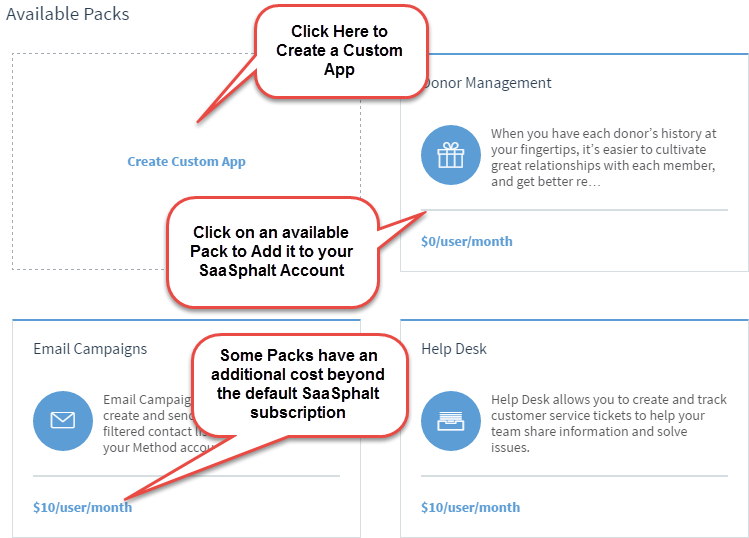
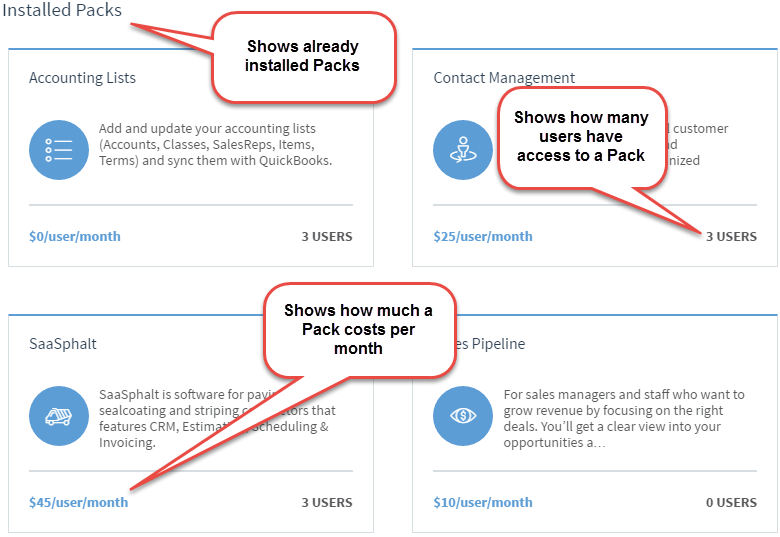
In the Marketplace you can also look at all of your already installed Apps/Packs
| Created by | Matt R. on | May-23-2013 |
| Last modified by | Matt R. on | Nov-13-2016 |