New opportunity
Solution No. 313
OVERVIEW
How to create a new opportunity
How to associate an activity with an opportunity
How to associate follow up activities with an opportunity
Video tutorial
SCREEN OVERVIEW
New Opportunity
Existing lead/customer
New lead/new customer
Add additional info
New activity
Schedule follow up
Buttons
Overview
The New opportunity screen is your home base for creating an opportunity when one presents itself to your business. The information you provide in this section will create a record in Method of all the pertinent details associated with this opportunity and insert it into the Pipeline (which we discussed in the Overview to this section). This section will outline how to make a new opportunity and how to associate activities with an existing opportunity.
back to top
How to create a new opportunity
The following are the basic, bare-bones steps required to make a new opportunity in Method CRM. There are other options available that will be discussed in further sections - see the Table of Contents at the top of this document for more information.
- In Method CRM, click Opportunities > New Opportunity
- Click on the Assigned to drop down list and choose a Method user to whom this opportunity will be assigned. This user will receive email notifications about this opportunity if you choose to send them out.
- Click on the Close date drop down list and choose a date at which you would like to see the opportunity closed. Ideally it will be designated a closed-won!
- Click on the Opportunity name field and type in a name for your opportunity.
- Click on the Stage drop down list and choose the stage most appropriate to your opportunity (see the Overview for more details). This will auto-fill the probability field with a number value expressed as a percentage.
| TIP |
If you wish to, fill in a projected dollar value you estimate this opportunity is worth to your business in the Amount field. This is not a required field |
- Choose whether this opportunity is an existing lead or customer a new lead or a new customer by clicking on the requisite check box. Making this distinction will determine what screen is generated directly below.
- If you choose Existing lead/customer, click on the Contact drop down list and choose the appropriate contact. This will generate that contact's Contact information and will auto-fill the requisite fields below with any information already associated with that contact. It is not necessary to fill the Contact name, phone, and email fields if the information is not provided, but it is suggested.
- If you choose New lead or new customer, the screen generated has the same fields associated with both. Fill out the Customer name and Contact name fields.
| TIP |
The rest of the fields are not required though it is beneficial to include as much information as possible, as it will be saved in the customer or lead record associated with this opportunity. You can use the Copy address button to copy the information in the Bill to fields to the Ship to fields if they happen to be the same. |
- Although the Description field is not mandatory, it is beneficial to include a brief description including a call to action regarding next steps to take with this opportunity.
- Click Save at the bottom of the screen. This new opportunity will now appear in the existing opportunities grid.
back to top
How to associate an activity with an opportunity
Associating an activity with an opportunity is a good way to create the "trail of breadcrumbs" that allows you to keep track of the progress of an opportunity as it progresses through the pipeline. It is also a great way to make sure you and your staff follow up on opportunities and maximize the potential for gained revenue. There are two ways to associate an activity with an opportunity: one through the new opportunity screen, and one through the edit opportunity screen. The screens they generate are slightly different, so we'll deal with each individually.
From the new opportunity screen:
-
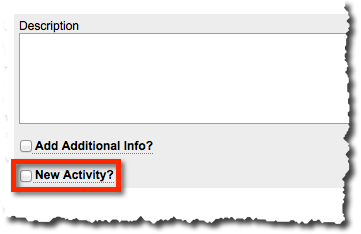
From the New opportunity tab link scroll down until you see the check box marked New activity? and click on it. Here's what it looks like:
-
This will generate the New Activity screen. Choose a Method user to Assign the activity to from the drop down list on the left.
-
Choose an Activity type from the next drop down list, depending on what kind of activity you'd like to assign (e.g. a phone call or email).
| TIP: |
The rest of the fields are optional: you can Add an activity contact and his or her pertinent information including phone number and email address, you can choose an activity status or priority (using the ellipses button [...] next to each will generate the Add/Edit screens for both; please see the pertinent documentation in the Activity section), you can choose to ask Method to generate an email notification of the activity that will be sent to the Assigned to contact, and you can include Comments pertaining to the activity.
|
-
Clicking save will save the information in the fields and assign the activity an Activity # that will now appear in the above field and can be used to search for the activity in your Activities List.
From the edit opportunity screen:
-
Once you have chosen the opportunity you'd like to edit from the Opportunities list (see Edit opportunity for more information), navigate down the Edit opportunity page until you see the toolbar with the clickable link marked New/Edit Activity. Clicking on it will generate the New/Edit Activity screen.
-
Follow Steps 2-4 from the New Opportunity section above.
| TIP: |
The rest of the fields are optional: you can add a date and time for time-sensitive activities, choose an status type and priority, for the activity, ask Method to generate an email notification of the activity that will be sent to the Assigned to contact, and you can include detailed Comments within the HTML editor provided on the page. |
-
Click Save & Back to save the information in the fields, assign an Activity # that will now appear in the above field and can be used to search for the activity in your Activities List, and close the screen, returning you to the Opportunities list.
back to top
How to associate follow up activities with an opportunity
Following on our "trail of breadcrumbs" analogy from earlier, it's very important in the interest of maximizing your potential for revenue that you or your employees follow up with opportunities as quickly and efficiently as possible. This can help move the opportunity through the Pipeline toward a closed-won status. Once an activity has been associated (say, for example, a phone call), following up that activity can keep the trail of breadcrumbs going and ensure a complete history of your association with this opportunity moving forward. As with a new activity, there are two ways to schedule a follow-up activity through the Opportunities tab: through the New opportunity screen and through the Edit opportunity screen. Let's take a look at each.
From the new opportunity screen:
-
From the New opportunity tab link, scroll down and click "New activity?". When the screen generates, scroll down until you see the check box marked "Schedule a follow-up" and click on it. This will generate the Schedule a follow-up screen.
-
Choose a Method user to Assign to this follow-up from the drop down list.
-
Choose a Follow-up type from the drop down list (e.g. a phone call or email).
-
Choose a date you would like the Follow-up due on. The drop down list will generate a clickable calendar.
| TIP: |
The rest of the fields on this screen are optional. You can choose to add a Follow-up contact from the available drop down list, which will auto-fill the Name, Phone, and Email fields below if the information is provided in the Contact's record, add a follow-up status and type, and ask Method to generate an email notification of the follow-up that will be sent to the Assigned to contact.
|
-
Clicking Save will save all the changes you've made to the fields and create the follow-up record in Method. It will also generate a unique activity number that will allow you to search for this particular follow-up activity in the Activities list.
From the edit opportunity screen:
-
Once you have chosen the opportunity you'd like to edit from the Opportunities list, navigate down the Edit opportunity page until you see the toolbar with the clickable link marked New/Edit Activity. Clicking on it will generate the New/Edit Activity screen. From there, click the Schedule a follow-up check box, which will generate the Schedule a follow-up screen.
-
Follow Steps 2-4 from the New Opportunity section above.
| TIP: |
The rest of the fields on this screen are optional. ;You can choose to include a follow-up contact from the drop down menu, choose a status and priority for your follow-up, and ask method to generate an email notification of the follow-up that will be sent to the assigned to contact.
|
-
Click Save & Back to save the changes you've made to the fields and create the follow-up record in Method. This will generate a unique activity number that will allow you to search for this follow-up in the activity list, and will close the screen and return you to the opportunities list.
back to top
Video Tutorial
back to top
Screen Overview
The following is a breakdown of the New opportunity screen. We'll take a closer look at each element of the screen (drop down menus, buttons, etc.) so you know exactly what each element does. We hope this will be a useful "glossary" of sorts for new users!
back to top
New opportunity
When you click on the New opportunity tab link, you'll see several elements to this screen. Let's look at each one individually.
- Assigned to: This is a required field, meaning there must be a value included in order for the opportunity to save to Method. You can use this drop down list to assign the opportunity to one of the Method users associated with your Method account.
- Opportunity name: Also a required field, this is the information that will appear in the "Name" field of the opportunity. We find it helpful to include not only the name of the lead or customer in question, but also a brief description of the product or service they're interested in.
- Close date: This is also a required field, and refers to the date at which you hope to close the opportunity (that is to say, the date you hope to close it as a won opportunity; see Opportunity list for more details). Clicking the drop down list generates a calendar from which you can choose a close date.
- Stage: Assigning a stage to an opportunity means identifying how far along the pipeline the opportunity is. You will notice that each option in the drop down list has a number corresponding to it on the right hand side. That number refers to the Probability we will talk about in a second.
- You also have the option to Add new, either by selecting it from the drop down menu or by clicking on the ellipses button (...). See New/edit opportunity stage for more details.
- Amount: This field isn't required but it can be helpful to further keep track of your opportunities. The Amount field refers to how much money the opportunity might be worth to your business. In some cases, this amount can be static (for certain goods and services, a flat rate is charged and it's the same every time). In other cases, this might be an estimate based on, for example, how many hours the job is expected to take to complete.
- Probability (%): This field is automatically generated depending on which Stage you chose to assign to your new opportunity. The probability value refers to how likely this opportunity is to be won by the close date. It is used in conjunction with the Amount above to determine the pipeline value you find in the Opportunities list.
There are also three clickable icons located below, each of which generates a different screen to continue the New opportunity process: Existing lead/customer, New lead, and New customer. Let's look at each individually.
back to top
Existing lead/customer
This means the contact for whom this opportunity is being created is already in your Method database, either as a lead or a customer (please see the Leads and Customers sections of this documentation for more information). Clicking on the drop down menu will show you all of the available contacts within your Method environment, and choosing one will populate the fields below with the information provided for that contact. This means you can see everything to do with this lead or customer without having to navigate elsewhere.
back to top
New lead/new customer
Clicking on either "New lead" or "New customer" will generate the same fields to be filled out; only how the contact is identified within Method will change (see Leads and Customers for more information on the difference between the two). Most of the fields here are pretty self-explanatory (everyone knows that "Phone" means "contact phone number", or what a zip code is!), but there are a few that aren't, so let's focus in on them.
- Customer name: This is a required field, which means it must be filled out in order for Method to be able to save this new opportunity. The reason the Customer name is a required field is because of the way Method retrieves information from Tables. Often, the Customer and Company names might be the same (for example, a proprietary company like Bob's Grocery Store). However, sometimes you will need to differentiate between the Customer and the Company (for example, if Target is the parent company and you are only dealing with the store in Fort Worth, Texas, then the Customer name would be Target Fort Worth).
- Contact name: Again, this is a required field, and with good reason: your Contact is the person you call and ask for when you call your Customer's phone number. For example, your Contact at Target Fort Worth might be Bill Taylor. This can help you keep track of personal relationships as well as help to filter grids elsewhere in Method.
- Sales rep: This drop down list will include all of your sales representatives associated with this Method account. While you don't need to associate this new lead or customer with a sales rep, this drop down list gives you the option to do so.
- Copy address: This button simply allows you to automatically copy the address information you inputted for Bill To on the left-hand side directly into the Ship To on the right. It might not sound like much, but it can be a real time saver for your shipping and receiving department!
- Description: Here you can include any pertinent notes associated with this new lead or customer. These notes will appear in the Description field of your Opportunities list, so keeping them short and sweet can give you reminders about any important info directly from the list screen. This part of the screen will appear in the New Lead, New Customer, and Existing Lead/Customer iterations of this screen.
There are three check boxes directly beneath the Description field that also apply to all three iterations of this screen: Add additional info, New activity, and Email opportunity notification to user when saving. Clicking on the Email opportunity notification box will automatically generate an email that will be sent to the Assigned to Method user when you save the opportunity. More on that in a moment. The other two check boxes are a bit more involved, so let's take a look at them now.
back to top
Add additional info
Clicking on this check box will generate another section to the screen: the Additional Info section.
Type: This drop down list refers to what kind of opportunity this will be. The two default settings are "New Business" and "Existing Business", which usually refers to whether or not the opportunity is bringing in new business to your company or expanding on an existing deal (such as providing additional services to a customer who already uses some). You can also create a new opportunity type; see New/edit opportunity type for more information.
Lead source: This drop down list refers to where this opportunity came from. We will discuss Leads in more detail elsewhere in this guide. The options are all pretty self-explanatory: you are choosing a lead source based on why the customer is seeking out your product or service. They may have heard about you through word-of-mouth, or by way of advertising, and so on. Choose the one that most suits this opportunity. You can also create your own, or edit an existing source. See New/edit lead source type for more information.
Next step: This is a writable field that allows you to leave a note associated with this opportunity. The next step field is meant to be used to include a short description of the next task or focus towards closing the opportunity. For example, a next step might read "Proceed with demo" or "Send marketing material". A next step relates to the stage the opportunity is at, and what steps need to be taken to move it to the next stage, with the ultimate goal being a "close/won" status!
Primary campaign source: As there is no out-of-the-box campaign source option, we will discuss this further in the Campaign section of this guide.
back to top
New activity
Clicking on the New activity check box will generate another section to the screen: the New Activity section. This section is described in detail in the instructions.
back to top
Schedule follow up
At the bottom of the New activity screen there is a check box marked Schedule a follow-up. This section is described in detail in the instructions.
back to top
Buttons
At the bottom of the screen, you will see the standard four buttons you've become accustomed to throughout Method.
More actions: This button offers you four separate options.
-
Choose email template: Clicking this option will open the Choose email template screen. This will allow you to choose the email that will be sent out automatically if you click on Email opportunity notification to user when saving. For more information on email templates, see Choosing an email template in the Activities section of the guide.
-
Clear/new: This option will clear the fields in the New opportunity screen and allow you to create a new one.
-
Delete opportunity: This will delete the selected opportunity. You can't undo this action.
-
Spell check - description: Clicking on this option will run an internal spell check on any text in the Description field. It's a handy tool to make sure all your information is correct!
Save: This button will save all current changes and keep you on this screen.
Save & New: This button will save all current changes and then clear the fields so you can create another new opportunity.
Save & Edit: This button will save all current changes and then transport you directly to the Edit Opportunity screen, which you can learn about here.
back to top
| Created on | Dec-20-2012 |
| Last modified on | Sep-17-2015 |