Create a customer portal
Solution No. 867
The following steps will show you how to create a new portal intended for customers.
- Click Customize > Portals.
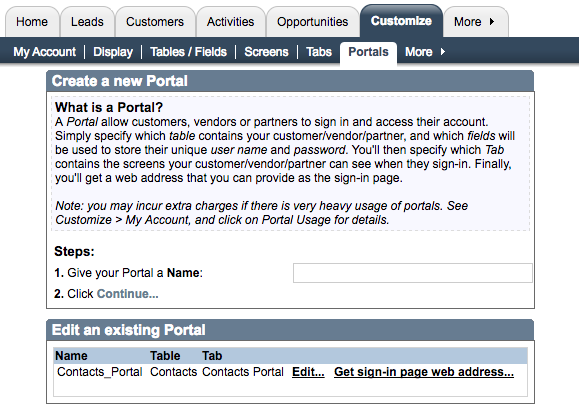
- Give your portal a descriptive name.
- Click Continue to open the next steps.
The next steps identify the table and fields where your customer information can be found. When a customer starts using your portal, s/he may be prompted to register on a screen that looks like this: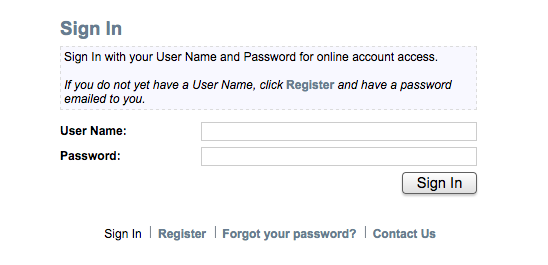
Your customers may not have to register in order to use your portal. When they are emailed notifications for transactions and/or cases, they are provided a unique link that does not require a User Name and Password authentication.
As you can see, they are required to fill in a user name and email address. When they click Submit, Method stores this information in a table and sends them an email with a temporary password they can use to sign in and immediately create their desired password, which is also stored in a table. Moving forward, this information identifies the customer(s) signing in and gives them access to the portal. The default table and fields where this information is stored are noted in the following steps.
Method best practice says to leave the defaults where they are, unless you have an advanced understanding of table structure.
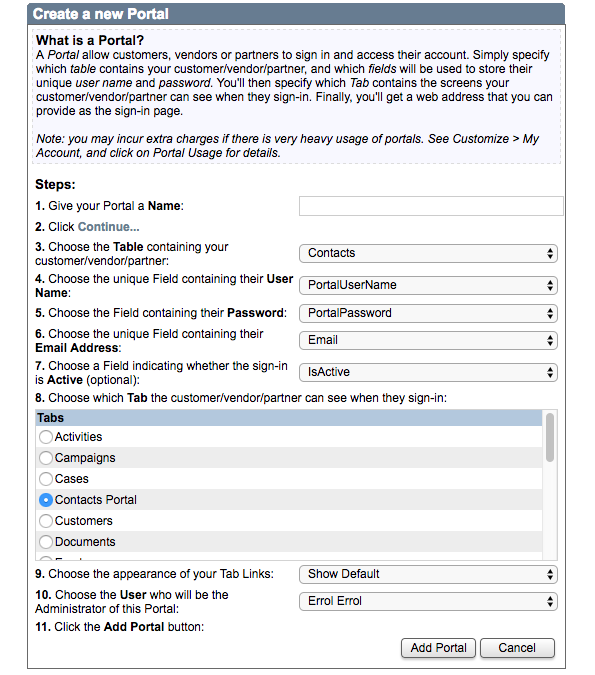
- Choose the table where your customer information is saved (by default, this is the Contacts table).
- Identify the unique field containing their User Name (by default, this is Portal User Name).
- Identify the field containing their Password (by default, this is Portal Password).
- Identify the unique field containing their email address (by default, this is Email).
- You can also choose to identify the field noting whether this sign in is active (by default, this is IsActive).
- Choose the Tab the customer is redirected to on sign-in (by default, this is Contacts Portal).
The default assumes you are setting up a portal for customers. You may wish to choose a different tab to show to vendors or partners.
- You can customize the appearance of your tab links or hide them altogether.
Hiding your tab links could limit the customer's ability to use your portal.
- Assign a Method user to administrate this portal (by default, it is the user signed in).
This user will receive emails pertaining to portal activity.
- Click Add Portal. The portal is now visible in the Edit an existing Portal grid below.
From here you can retrieve the sign-in page URL (see step 9 in Edit existing portal settings).
You can also choose to further refine your portal by clicking Edit…. Please see the next section for more information.
[top]
| Created on | Feb-25-2016 |
| Last modified by | Caleb J. on | Nov-01-2016 |