Configure users
Solution No. 857
Once you have invited a new user or users to your Method account, it's time to set them up! The following steps will show you how to configure users in Method.
- Click Customize > Users.
- Under Edit An Existing User, choose the user you'd like to configure and click Edit.
- You're directed to a ten-step wizard called Edit Settings.
You can navigate back and forth through these steps using the Next and Previous buttons. Your changes will only be saved when you click Finish. If you click Cancel, none of your changes are saved.
- Step 1 looks like this:
 You are asked to provide the following information:
Click Next to continue.
You are asked to provide the following information:
Click Next to continue.
- In step 2, customize the user's email signature and determine whether the user is using default email settings.
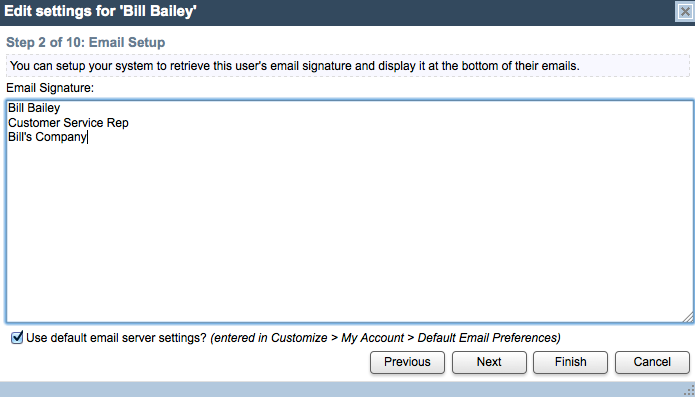
- If Use default email server settings is checked, the user will use the settings you set up in your defaults.
- If it is unchecked, you are prompted to fill in the SMTP server, user name, port and password. Please see Email settings for details.

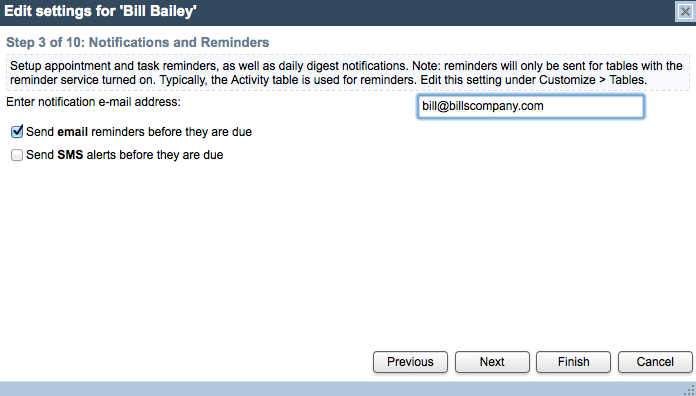
- Step 3 sets up email and SMS reminders, typically pertaining to activities assigned to the user. If enabled, these reminders are sent 15 minutes before the due date and time.
The email address used for notifications does not have to be the same as the address the user uses to sign in.
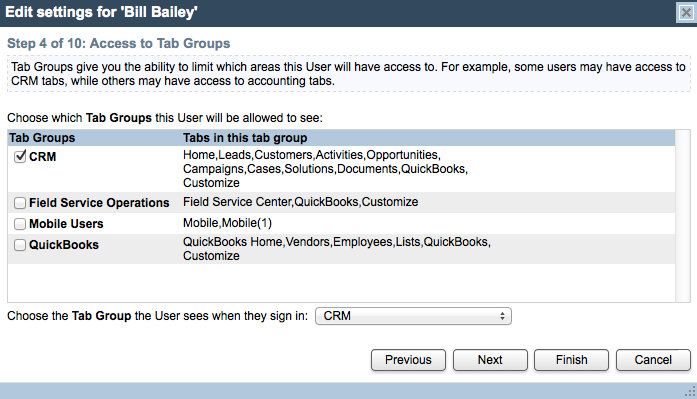
- Step 4 identifies what Tab Group(s) the user has access to, and which group they will see upon signing in. For more information on tab groups, please click here.
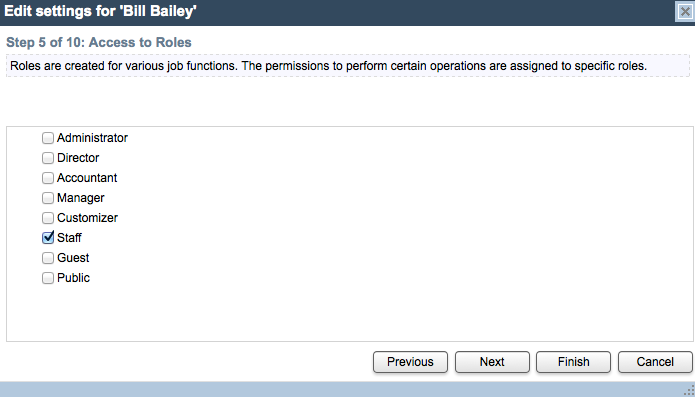
- Step 5 allows you to identify the user's role, which determines their permissions (what tabs, tab links and even screens they are allowed to interact with in Method). For more on roles, please click here.
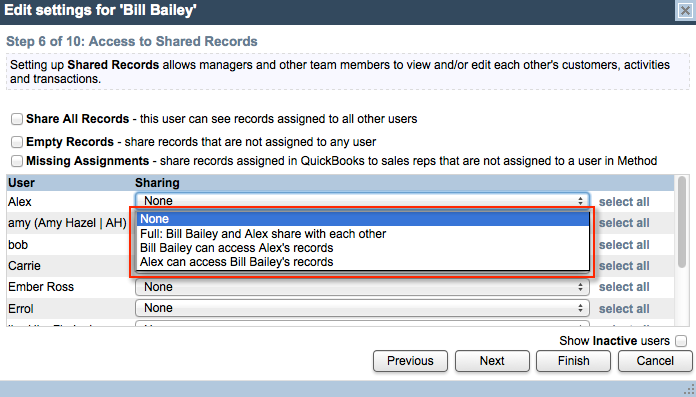
- Step 6 lets you give the user access to shared records (e.g. activities, opportunities, transactions assigned to other users). You can allow access to all records, or only the records assigned to particular users. You can also allow those users access to this user's records from the same screen using the noted dropdown.
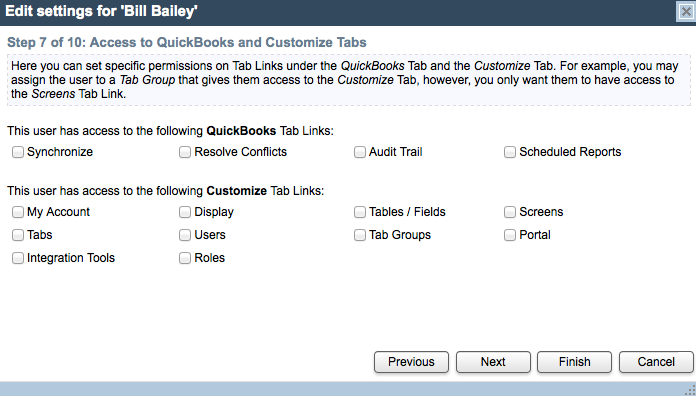
- Step 7 gives you more control over this user's access to the QuickBooks and Customize tabs. On this step, choose which tab links under each tab the user can access (e.g. you may want them to have access to the My Account tab link, but not Roles or Integration Tools).
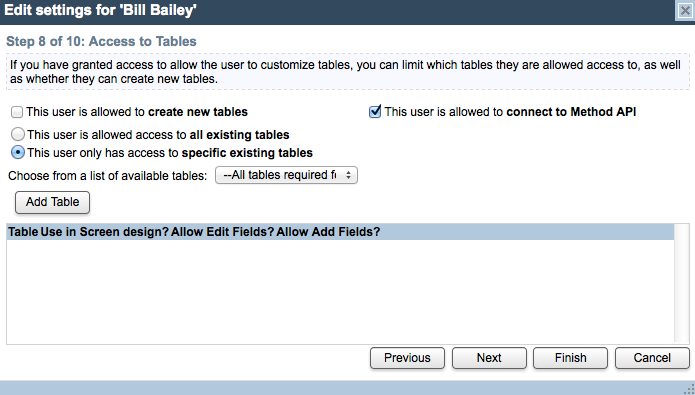
- Step 8 gives you control over how this user interacts with tables. If you have given this user access to customize tables, you may wish to limit which tables they can customize. You can also give them permission to create new tables and to access Method'sAPI.
API access is required for this user to use the Import/Export tool, Method's Report Designer and other third-party tools. Users without API access cannot access these tools.
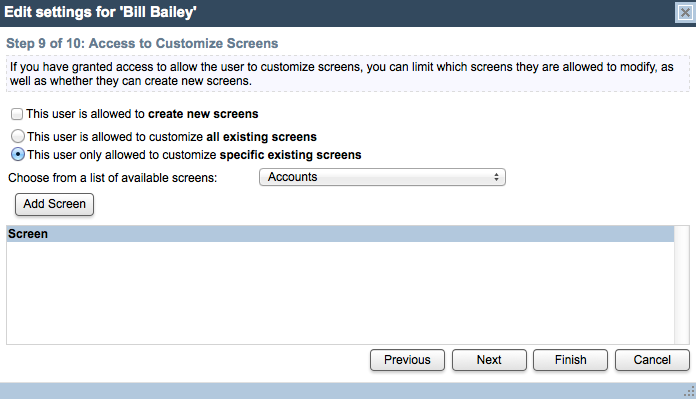
- Step 9 gives you control over how this user interacts with screens. If you have given this user access to customize screens, you may wish to limit which screens they can customize. You can also give them permission to create new screens.
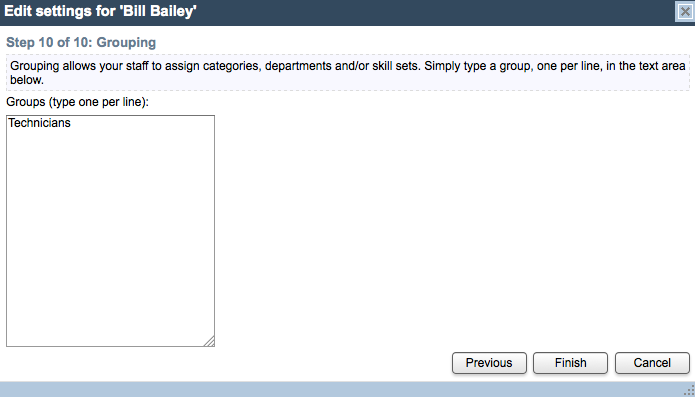
- Step 10 lets you assign groups to this user. Groups can be used to categorize multiple users under specific titles (e.g. Technicians). However, using this feature requires customization. Please contact our Business Solutions Specialists for more information.
- When you have finished making your changes, click Finish to save them.
Your user is now configured! You can come back at any time and change these settings for this or any other user following these steps.
| Created on | Feb-16-2016 |
| Last modified by | Caleb J. on | Sep-20-2019 |