Using grids
Solution No. 283
Grids are used throughout Method to access and display information on screens, and to filter or sort the information being displayed.
- Sorting means putting all information in a grid in a specific order (e.g. alphabetically or by date).
- Filtering means applying criteria to display only the information you want to see (e.g. overdue invoices only).
Most tabs have a grid screen – for example, the Existing Customer Contacts List shows you all customers and contacts currently saved in your Customer table.
Only a few grids in Method (e.g. transaction grids) can be edited without customization; the rest are read-only by default.
Since most grids work largely the same way, we’ll go through the basics here. You can learn more about the specifics of individual grids by reading the documentation for each tab.
Let’s take a look at a sample: the Exsting Customer Contacts List.
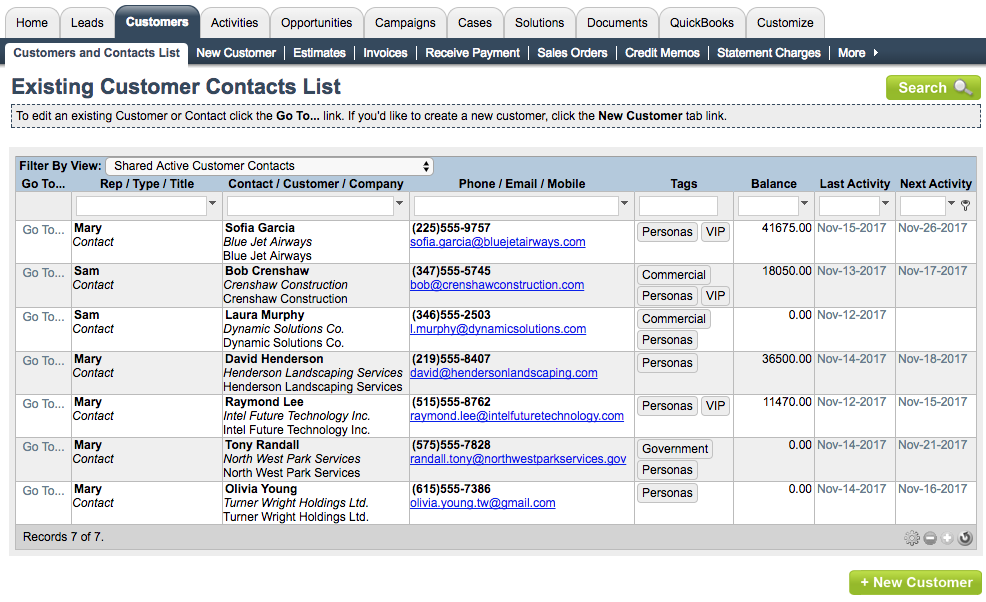 There are a number of elements of this screen that are standardized across Method grids.
Sorting options[top]
Grids in Method have a sorting function (similar to an Excel spreadsheet) that allows you to reorder how infomation is displayed based on certain criteria.
 Clicking headers order the grid alphabetically or numerically according to the information in this column. In the example above, clcking the header orders the grid alphabetically by Contact, Customer or Company name. This function is available in all column headers: click once for descending (A-Z, 0-9) and again for ascending (Z-A, 9-0).
Without customizing the grid, you can only sort the grid by one column at a time. For example, you cannot alphabetize a list and then apply a second sort based on outstanding balance.
Filtering options[top]
Method lets you filter the information in your grids (only displaying information meeting certain criteria) in a variety of ways.
Using the Filter View
Depending on the settings for the grid you’re currently using, you might be able to choose from a preset list of filter criteria, chosen from a dropdown.
This dropdown lets you filter your grid based on filter views. Method displays only the records in the table that meet the criteria of those views. The available filter views change depending on where you are in Method (for example, the “overdue invoices” view is unique to the Existing Invoices grid) but the two most common views are “my” and “shared”.
- My records are assigned to the user currently signed into Method (e.g. my activities, my invoices, etc.)
- Shared records are assigned to other users that you have permission to see (e.g. in the shared view, Bob can see estimates assigned to Sherry if he has permission to do so).
To learn how to assign shared permissions to users, see Configure users.
The filter views can be used in conjunction with filter row fields for even more specific filtering. Please see the next section for details.
Using the filter row field
If you need a more detailed filter option, this field allows you to filter for the specific information you want the grid to display.
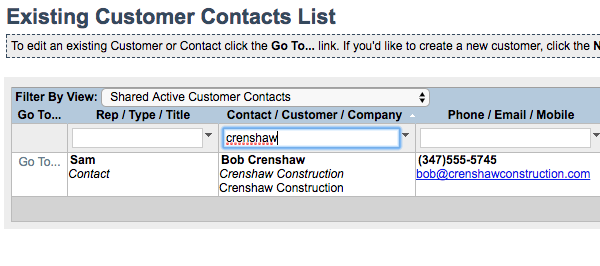 For example, if you wish to see all records related to Bob Crenshaw:
- type "Bob Crenshaw" name into the name filter field, and
- press enter.
All records related to Bob Crenshaw are now displayed in your grid!
You can add further criteria by typing values into filter row fields in other columns. For example, if you had more than one Bob Crenshaw in your Existing Customer List, you could further filter the list by email address, using the same steps above in the Phone/Mobile/Email filter row field.
You can apply a filter view and then use filter row fields to even more accurately search for records.
Beside each filter row field is a dropdown of sorting options. 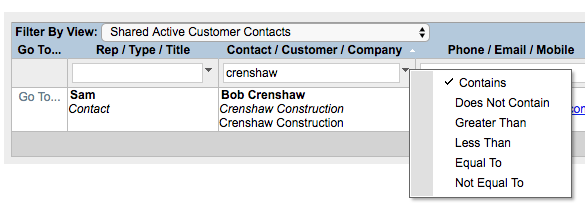
- Contains: Display all records containing these characters (e.g. "mit" displays names like Smith)
- Does Not Contain: Exclude all records containing these characters(e.g. "mit" excludes names like Smith)
- Greater Than: Display numerical records greater than the value (e.g. "100" displays all balances of $101 and up).
- Less Than: Display numerical records less than the value (e.g. "100" displays balances of $99 and down).
- Equal To: Display all records exactly matching these characters (e.g. "Amy" displays Amy Smith, Amy Jones, etc.)
- Not Equal To: Exclude all records exactly matching these characters (e.g., "Amy" excludes Amy Smith, Amy Jones, etc.).
Some dropdowns contain additional criteria:
- Begins with: Display all records beginning with these characters (e.g. "Al" displays Albert, Alyssa, etc.)
- Ends with: Display all records ending with these characters (e.g. "my" displays Amy, Tommy, etc.)
Grid navigation[top]
At the bottom of the grid, you’ll see a bar that looks like this:

By default, Method displays ten records per “page” on this screen, so if you have more than ten records in a grid, you will have more than one page of records. You can see how many records are being displayed versus how many records there are in total.
The arrow buttons allow you to navigate through the records.
- < moves back one page
- > moves forward one page
- << returns you to the first page
- >> skips you to the last page
You can also click individual page numbers to jump to that page.
Clicking the Gear icon allows you to determine what columns are included on your grid. The options vary from grid to grid, depending on the information available. The defaults appear as checked off, and additional options can be checked on this list.

Clicking Update shows these columns in the grid.
The + and - buttons allow you to expand the number of records shown from 10 to 25, 50, 100 and so on, and hide them in the same way. The minimum number of records that can be displayed is 0 to 10.
Refresh reloads your list to reflect the latest changes.
Any changes you make to your list screen only affect this Method session. If you refresh your browser or sign out and sign back in, all grids revert to their default settings. You can make your changes again, or you can alter the default settings for the list (contact a
Business Solutions Specialist for more information).
[top]
| Created on | May-17-2013 |
| Last modified by | Caleb J. on | Nov-17-2017 |