Setting up defaults
Solution No. 703
When you have successfully installed the Method Outlook Plug-In and added your accounts, it is now time to set up your internal settings! You’ll notice two new buttons have been added to your Outlook toolbar, in the Method section. They look like this: 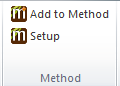 The first button, Add to Method, will be used in our section on Email functions, so let’s focus on the second button: Setup. Clicking Setup opens a window with four tabs, all designed to help you set your account preferences and defaults. These defaults determine how information you send to Method from Outlook will appear (in much the same way you can set your preferences in Method).
Let’s take a look at each in closer detail.
Method Account Settings[top]
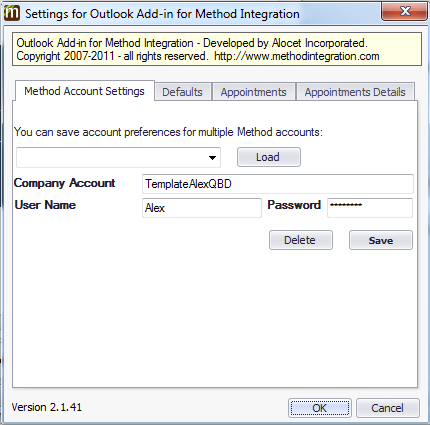 This tab lets you set preferences for multiple Method accounts. The dropdown contains all the accounts you added to the Outlook Plug-In, and gives you the option to add and/or delete more accounts from this screen the same way you did before.
 When you are referencing existing cases, customers, opportunities and vendors in the Add Activity to Method screen (see Email functions), you are given an option to view the existing case, customer or vendor in your browser. The defaults listed here determine what Method screen you’re redirected to when you choose that option.
 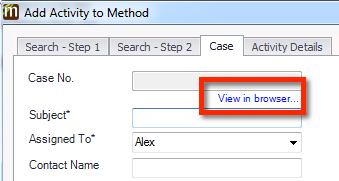 By default, you are taken to the Edit screen for each record type (Edit Customer, Edit Vendor, Edit Case, Edit Opportunity). You can change these settings, but it makes the most sense to be brought to the Edit screen in Method, which is populated with the information already saved for this record.
Appointments[top]
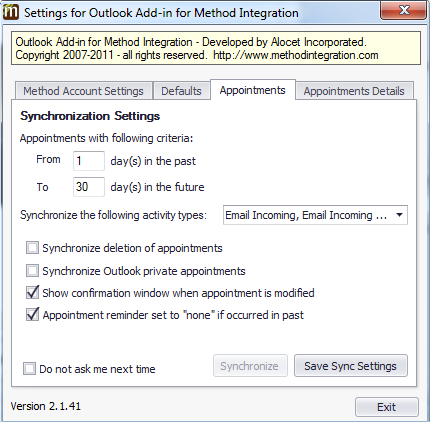 This tab allows you to set your synchronization settings: that is to say, what appointments will be synced to your Method calendar. If this is your first time configuring your settings, you'll receive a series of dialogue boxes telling you your settings haven't been properly set up. This is normal! Just click OK to proceed to your settings.
Whenever you click the Synchronize button in the Outlook toolbar, this screen opens to allow you to change or confirm your settings before syncing. However, if you're pleased with your settings, you can enable Do not ask me next time so this screen no longer appears (unless you click Setup > Appointments).
- The From and To fields allow you to set a date range of appointments that will be synced. By default, the plug-in will sync appointments from 1 day in the past to 30 days in the future (assuming a schedule of a month’s worth of pre-planning), but you can set your preferences by changing those dates.
- Synchronize the following activity types allows you to choose what activity types will be synced to Method. By default, all activity types are synced with Method, but if you prefer, you can choose to have some actions within Outlook excepted from the sync.
Method best practice says you should sync all your appointments with Method, since the point of a CRM is to help keep track of all your business interactions with customers, leads and vendors.
- Synchronize deletion of appointments, which is not checked by default, will ensure that an appointment you delete in Outlook will also be deleted in Method when the next sync occurs.
- Synchronize Outlook private appointments lets you choose whether appointments marked “private” in Outlook will be synced to Method. Again, this is not checked by default.
- Show confirmation window when appointment is modified brings up a message asking you to confirm whether the changes you made to an appointment were intentional. This can help prevent accidental data changes in two places (since a typo or other error in an Outlook appointment will sync to the corresponding record in Method!)
- Appointment reminder set to “none” if occurred in past means that, by default, any appointment that happened prior to today’s date should no longer have a reminder associated with it (since it’s already done!)
- Synchronize starts a sync with Method when you click the button.
If you have your sync set to occur every one minute, this option will not be accessible.
- Save sync settings saves your settings.
Appointments Details[top]
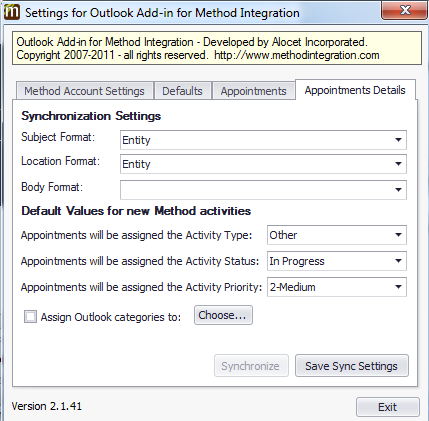 There are two distinct sections to this tab, each of which lets you set important defaults.
Synchronization settings
Users familiar with both Outlook and Method will notice that the fields for creating an Appointment versus an Activity are not the same across both programs. That's what these settings are meant to address. When you create an Activity in Method, these settings will tell Outlook where they should look in the Method record to populate the noted fields.
Default values for new Method activities
In Method, we allow you to set default values for when you create a new activity (for example, the default type, status, and priority). You are able to do the same thing in Outlook for when you are creating activities here!
- By default, the type is other, the status is in progress and the priority is 2-Medium. For more information on activity types, statuses and priorities, please click the aforementioned links.
- Assign Outlook categories to: Outlook categories are used to visually identify items in your Outlook by giving you the ability to assign one or more colors to an appointment. This option lets you link your existing categories to activity types and statuses in Method. When you assign a category to an appointment in Outlook, the linked type and/or status will automatically be assigned to the activity in Method. Choosing this option brings up this screen:
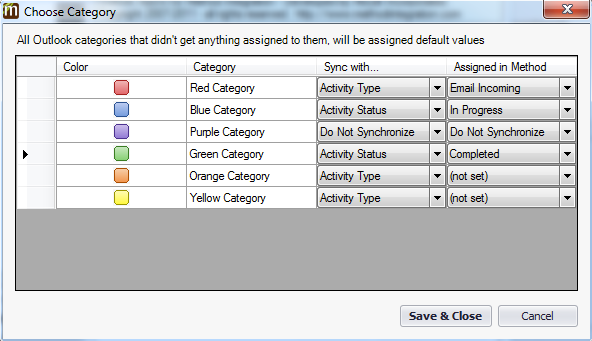 which allows you to assign your categories to an activity type or status, and then to specify which type or status should be linked. For example, you could choose to link your “green” category to the activity status “complete”. When you assign “green” to an appointment in Outlook, it will automatically be marked as “complete” in Method after the next sync!
Categories that are not assigned an Activity Type/Activity Status will use the default settings you set, unless you select Do Not Synchronize.
- Again, Save sync settings saves your settings.
[top]
| Created on | Nov-10-2015 |
| Last modified by | Caleb J. on | Feb-26-2016 |