Method Integration Engine
Solution No. 916
The Method Integration Engine is the main synchronization tool that shuttles changes back and forth between QuickBooks and the web server.
Step 1: Verifying the Method Integration Engine is installed
- In Windows, click Start > Control Panel, or Start > Setting > Control Panel, depending on your version of Windows.
- Double-click on Add or Remove Programs.
- Verify that both Method Integration Engine for use with QuickBooks and QBFC 8.0 are listed.
- If either is not listed, perform a complete installation again by following the steps for installing the Method Integration Engine.
Step 2: Verifying the Method Integration Engine is integrated with QuickBooks
- In QuickBooks, click Edit > Preferences.
- Click on the Integrated Applications icon.
- Ensure that Method Integration Engine for use with QuickBooks is listed.
- If it is, ensure it has a checkbox under the Allow Access column.
Step 3: Verifying error free synchronization
- Ensure that you are logged into QuickBooks as an administrator if it is a first time synchronization.
- If you are using Vista, make sure UAC is turned on.
- Click Start > Control Panel.
- Type “UAC” into the search box.
- Click Turn User Account Control (UAS) On Or Off; choose to turn on.
- Click Save, then restart your computer.
- With QuickBooks open, open the Method Integration Engine.
If the Method Integration Engine is not open, click Start > Programs > Method > Method Integration Engine for Use with QuickBooks. If the Method Integration Engine is not visible, right-click on the Method icon in your taskbar next to the clock in the lower right-hand corner of your screen, and click Display.
- Click Synchronize > Changes-Only Synchronization.
- When the synchronization completes, check the Activity area and scroll down to see if there are any messages that start with “Error”.
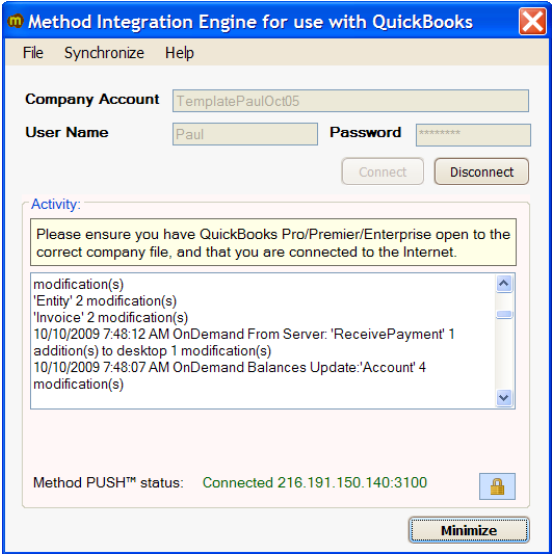
- If there are error messages, see if there are any recommendations written beside the error, and if so follow the recommendation.
- If you receive a message that reads “An internal error has occurred…”, it likely points to either an issue with QuickBooks, or corruption in your QuickBooks company file.
- To check for updates in QuickBooks, click Help > Update QuickBooks. If there are any updates to download you should download and install them, restart your computer, and try to synchronize again.
- To check for corruption in your QuickBooks company file, click File > Utilities > Rebuild Data. After the process completes, try to synchronize again.
- If there error messages persist, check for QuickBooks SDK issues by running a QBSDK Test:
- Open QuickBooks to the correct company file, then click F2.
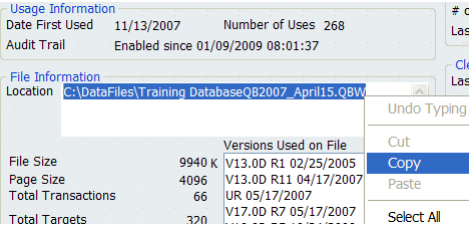
- Highlight the text in the Location text box in the File Information section.
- Right-click and choose Copy.
- Download and run the following utility: http://www.alocet.net/utilities/qbmodifycustomer4.exe
- In qbmodifycustomer4, paste the path into the Please enter the QB file name in full path text box, then click Next.
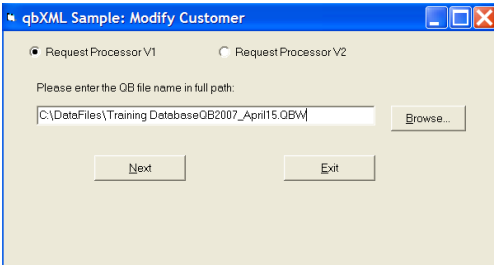
- Choose “Yes Always”.
- Select a customer from the Customer Full Name List.
- Click Modify > Modify Customer.
- If the QBSDK Test failed, you will likely have to reinstall QuickBooks. To properly reinstall QuickBooks:
- Make a backup of your QuickBooks company file.
- Uninstall QuickBooks from Start > Control Panel > Add / Remove Programs.
- Manually delete the “C:\Program Files\Common Files\Intuit\QuickBooks” folder.
- Reinstall QuickBooks.
- For further assistance, please contact technical support.
back to top
| Created by | Caleb J. on | May-13-2016 |
| Last modified by | Caleb J. on | May-16-2017 |